Check your robot in the browser
urdf2vla view opens a 3D page in your web browser showing your robot, its grasp point, the table and the cameras, so you
can check the setup — and answer urdf2vla's questions — without opening Isaac Sim or Omniverse.
It reads only the URDF and urdf2vla's settings, so it works right after inspect_robot and doesn't need the containers.
Open the address in a browser. From another computer on your network, use the second address it prints. Press
Ctrl+C in the terminal to stop it. If port 8080 is taken, the next free port is used and printed;
--port chooses another one.
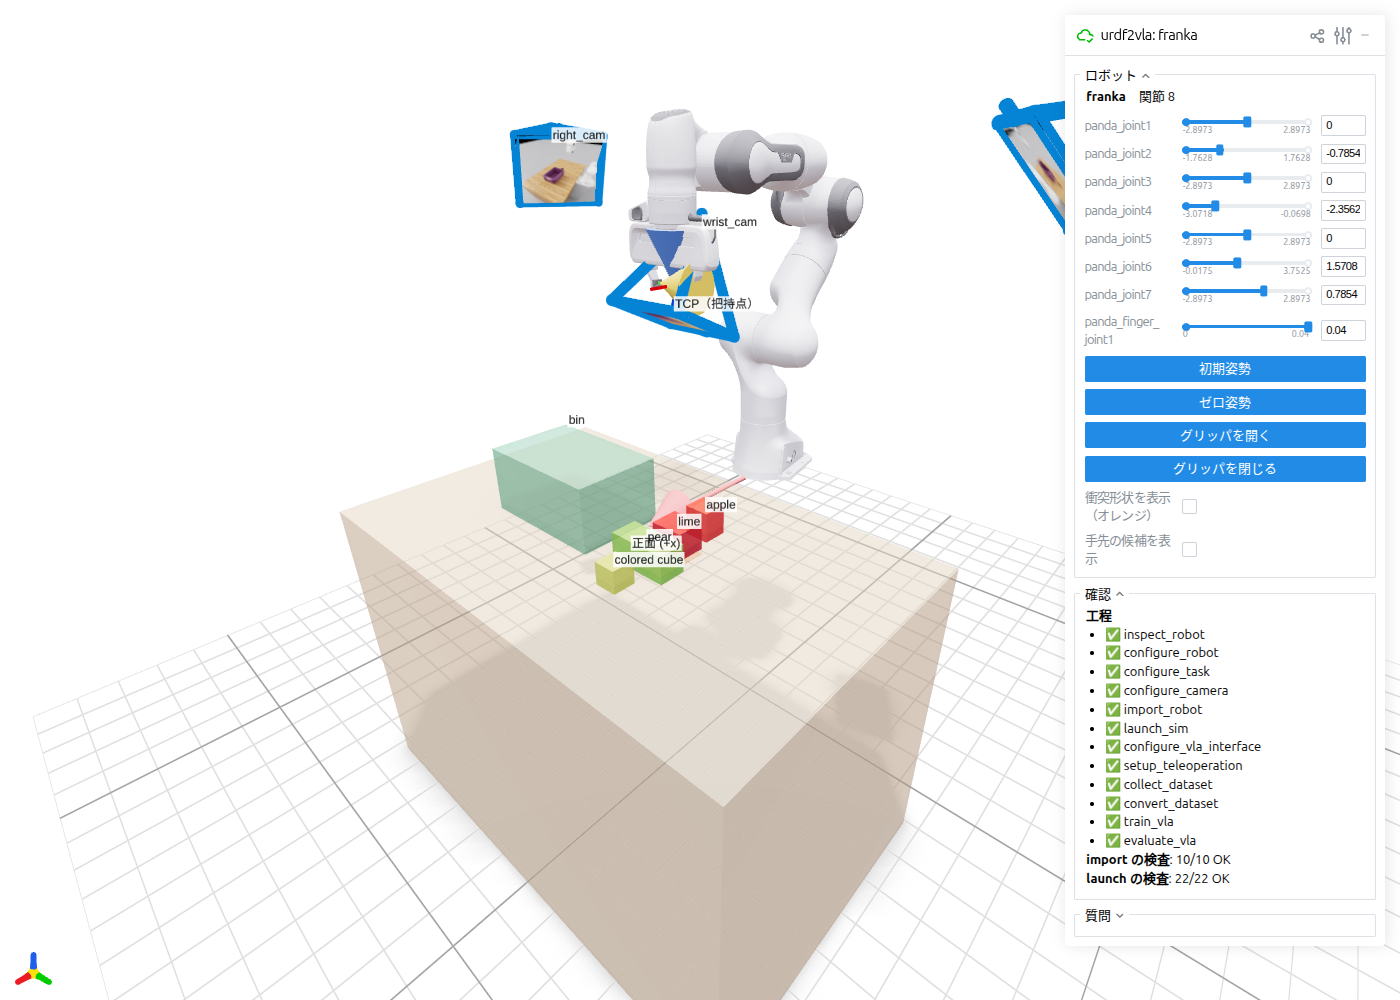
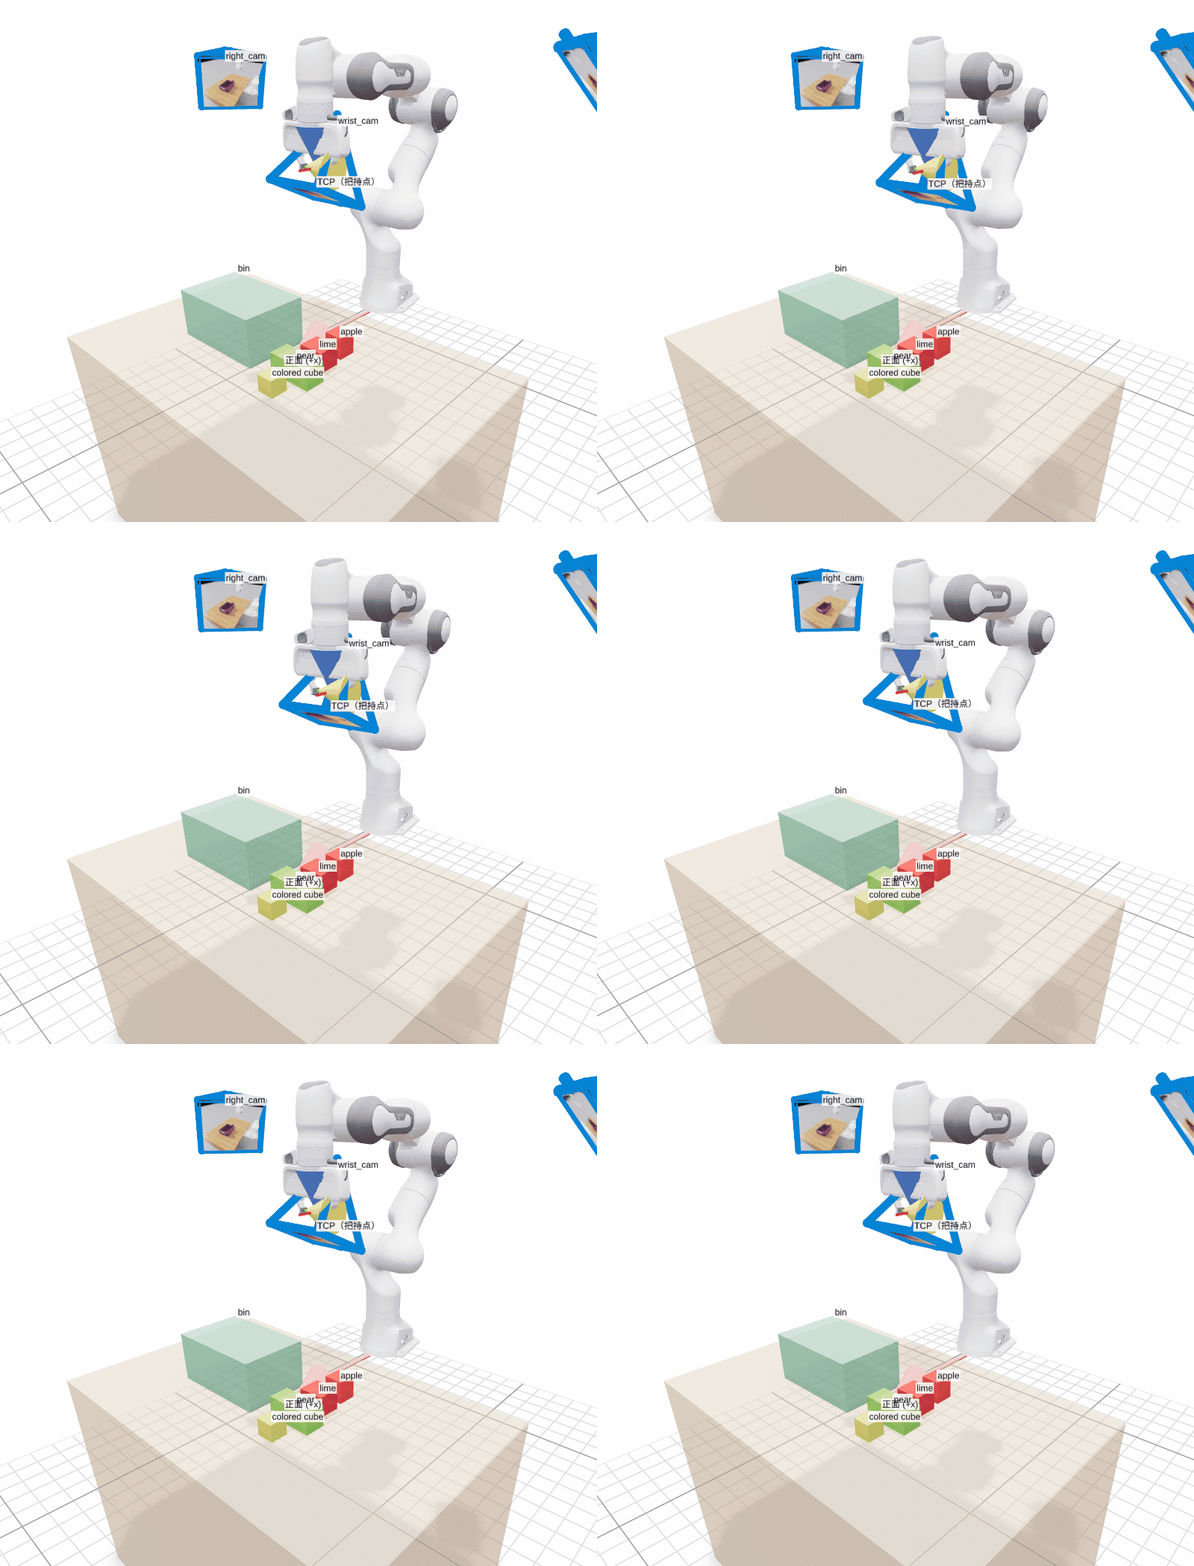
launch_sim.What to check
| In the 3D view | What it tells you |
|---|---|
| TCP(把持点) frame with a blue and an orange arrow | Where the gripper grasps. Blue = approach direction (should point down at the table in the initial pose), orange = the direction the fingers open. |
| 正面 (+x) red arrow | The robot's front. The table and cameras are placed in front of it. |
| Table, labelled boxes, orange patch, green box | The scene: the candidate objects (their bounding boxes, with names), the area where an episode puts its object, and the bin. |
| Blue pyramids | Camera positions and fields of view. After launch_sim, each shows the image that camera captured. Orange while you have unsaved changes to that camera. |
| Orange shapes (optional) | Collision shapes — what the physics engine actually uses for contact. |
Move the joints with the sliders and the TCP, the wrist camera and the gripper follow. Use the buttons to jump to the configured initial pose and to open or close the gripper.
Answering questions
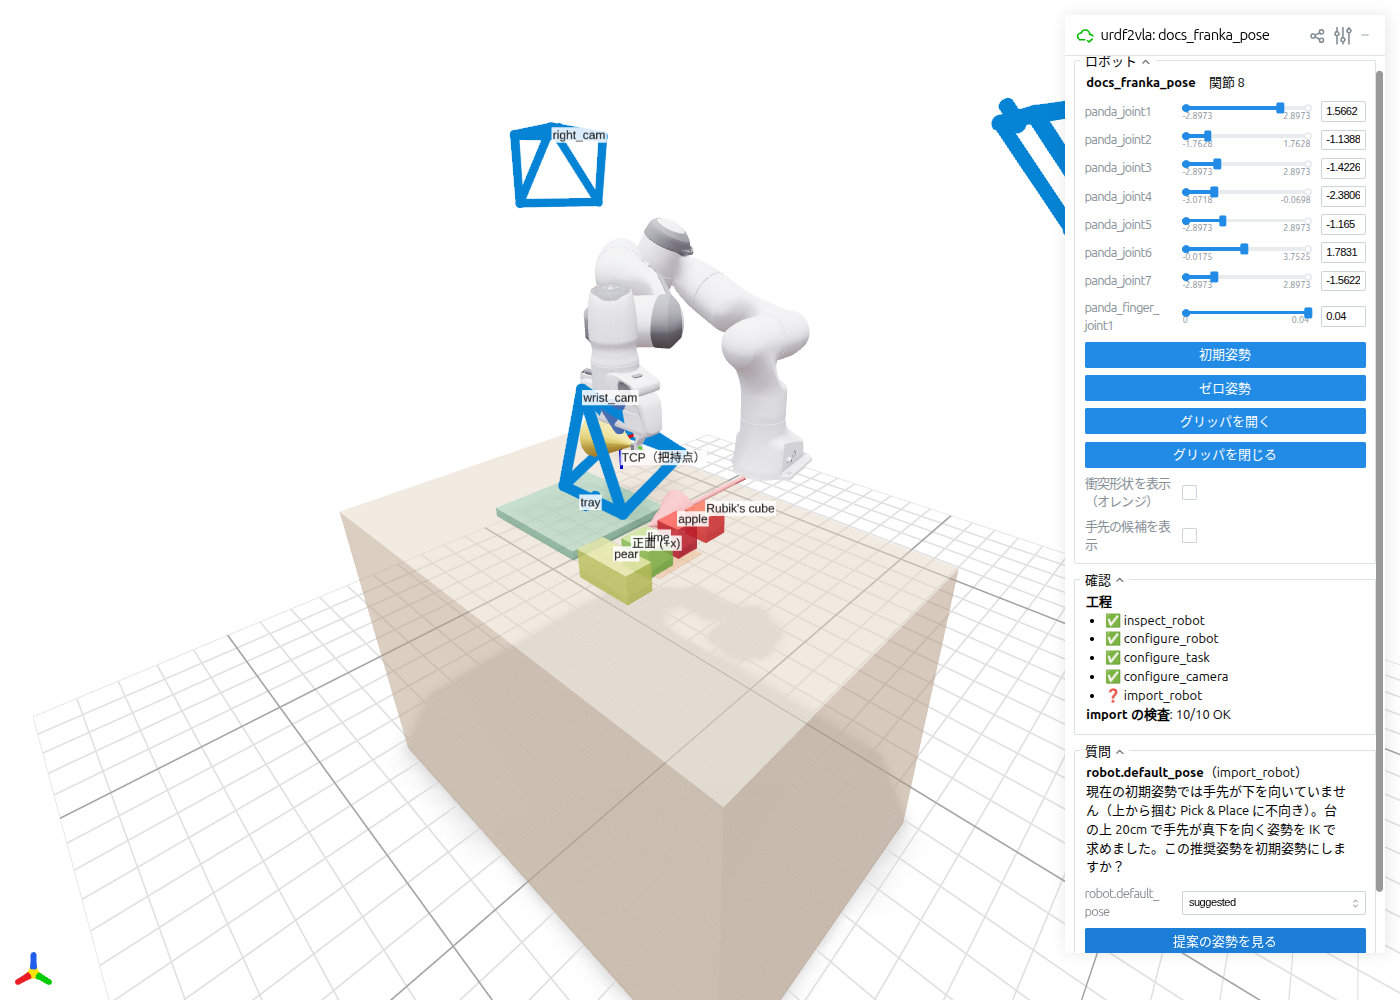
When a step returns needs_input, the 質問 (Questions) panel lists the open questions with the choices urdf2vla found.
Pick an answer and press 回答を保存 (Save answers). The answers are written to answers.yaml, exactly as
urdf2vla answer would; then run the step named in next.
- Choosing a hand-link candidate (
arms.<i>.ee_link; both arms have their own question) highlights that link in 3D. - When urdf2vla proposes joint values — for example a starting pose found by inverse kinematics — the 提案の姿勢を見る (Show the suggested pose) button moves the robot to it, so you can look before you accept.
Adjusting the cameras
The カメラ (Cameras) panel lets you place and aim each camera by eye, then saves the result for configure_camera.
It starts from the cameras the project uses now: what you saved here before, otherwise cameras: in project.yaml,
otherwise the default (the URDF's own cameras, or the DROID layout).
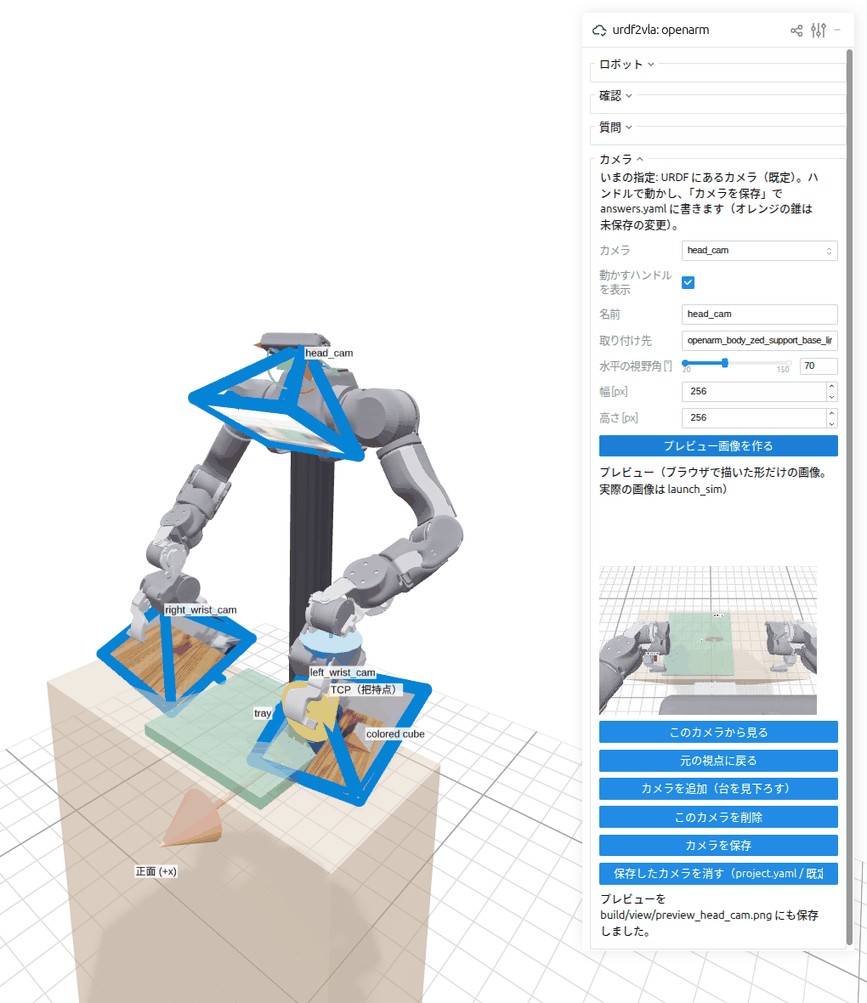
- Pick a camera. A handle appears on it; drag the arrows to move it and the rings to turn it. The camera's cone turns orange until you save.
- Change what it is attached to with 取り付け先 (Mounted on). Choose a link to make the camera move with it, for example the hand for a wrist camera, or world to fix it in the scene. The camera stays where it is on screen. The URDF's camera frames are listed first.
- Set the horizontal field of view and the image size.
- Check the view:
- このカメラから見る (Look through this camera) moves your view to the camera, and 元の視点に戻る (Back) returns.
- プレビュー画像を作る (Make a preview) renders a small image from the camera, showing only the shapes the
browser draws. For a camera inside a housing or a hand, robot meshes closer than its
clip_nearare hidden, as in the simulator. The image is also saved tobuild/view/preview_<camera>.png, so an agent can look at it.
- Press カメラを保存 (Save cameras). The cameras are written to
answers.yamlundercameras, which takes precedence overproject.yaml. Then runconfigure_cameraandlaunch_simagain;launch_simrenders the real images, and they appear on the cones here.
Cameras you didn't touch are saved as they were specified (preset: wrist, preset: urdf, …), so they still follow
later changes, such as a new table position. Moved cameras are saved as an explicit pose relative to the link they are
mounted on. The panel also shows the saved YAML so you can copy it into project.yaml. カメラを追加 (Add a camera)
adds a camera above the table, and 保存したカメラを消す (Clear saved cameras) removes your saved cameras and goes
back to project.yaml or the default.
The labels
The page is currently in Japanese. The controls are:
| Label | Meaning |
|---|---|
| ロボット | Robot: joint sliders and buttons |
| 初期姿勢 / ゼロ姿勢 | Go to the initial pose / all joints at zero |
| グリッパを開く / グリッパを閉じる | Open / close the gripper |
| 衝突形状を表示(オレンジ) | Show collision shapes (orange) |
| 手先の候補を表示 | Show the hand-link candidates |
| 確認 | Status: which steps have run and how many checks passed |
| 質問 / 回答を保存 | Questions / save the answers |
| 提案の姿勢を見る | Show the suggested pose |
| カメラ / 取り付け先 / 水平の視野角 / 幅・高さ | Cameras / mounted on / horizontal field of view / width, height |
| 動かすハンドルを表示 | Show the handle for moving the camera |
| このカメラから見る / 元の視点に戻る | Look through this camera / back to your view |
| プレビュー画像を作る | Make a preview image |
| カメラを追加 / このカメラを削除 | Add a camera / delete this camera |
| カメラを保存 / 保存したカメラを消す | Save cameras / clear saved cameras |
A SimReady gripper is drawn as a dark box
If you replaced the gripper with a SimReady asset, the viewer shows the URDF arm plus a box where the gripper is
mounted (the asset itself only exists in Isaac Sim). Use launch_sim --livestream to see the real gripper.